Multi-hypervisor OpenStack Cloud


Chose your own mis-adventure
TL;DR Just tell me how to do it
When deploying an OpenStack cluster its highly likely that you will, at some point, want to dive into other compute types allowing a project the ability to chose the best compute resources based on their needs. While this mythical capability has long existed in OpenStack there have been some exceptions with Ironic (baremetal) being the most notable one. In the before now Ironic needed to be deployed as a standalone region due to scheduler, network, and compute driver complications. However in the Newton time frame code was committed providing the Nova scheduler the ability to process requests based on hypervisor types.
This is the commit made the dream of Virtualization and Baremetal living together a reality by resolving bug 1606496 from within the Nova project.
This is the commit made it possible for OpenStack-Ansible to support both Ironic baremetal provisioning and traditional Virtualization within the same region of a single cloud.
With these two commits the OpenStack-Ansible deployment architecture is in a unique position where it can provide avenues of support for various services without wasting resources or creating contention. While OpenStack-Ansible has long had the ability to run multiple compute platforms, the OSA review illustrates the project's agility by showing how a simple addition to the environment opens up capabilities that, up until now, were thought to be impossible.
Why do you want this?!
We can now tailor workloads based on the needs of a project which allows us to maximize hardware though virtualization while providing a "performance use-case" by leveraging baremetal. This all achieved without any additional complexity or hardware overhead which is good for the administrator and great for the enterprise. Allowing workloads to be classified using virtualization or baremetal provides choice and choice is the embodiment of OpenStack. From storage backends to network topologies OpenStack allows for more choice than most cloud administrators would ever want. When it comes to being able to make decisions in the cloud, OpenStack offers just about everything imaginable. While not all projects and services are up to the same level in terms of capabilities and API completeness, options exist to fill common and niche use-cases. Long story short, having the ability to choose a virtualized or physical resource is a major win for the end user.
Ready, Set, Cloud!
When choosing to run multiple hypervisor types in a given region there's quite a bit to consider before running head first into the deployment. You need to make sure the environment you're deploying will support the end-result you're envisioning. Specifically, if you want to run Ironic make sure you have the minimal requirements for running OpenStack with baremetal provisioning already setup. Furthermore, getting familiar with Flavor and Image metadata, Scheduler Filters, and Host Aggregates will become greatly beneficial as you look to isolate workloads. While this post will cover simply using image metadata to achieve the stated goal of running Virtualization and Baremetal together, the metadata concepts and APIs are important.

So you want a Multi-Hypervisor cloud

For the remainder of this post, I'm going to assume OpenStack-Ansible has been used to deploy the cloud and that the existing environment is already providing for Nova compute resources and Swift object storage. We're also going to assume Ironic nodes are ready to be enrolled into the cloud and that IPMI access is available.
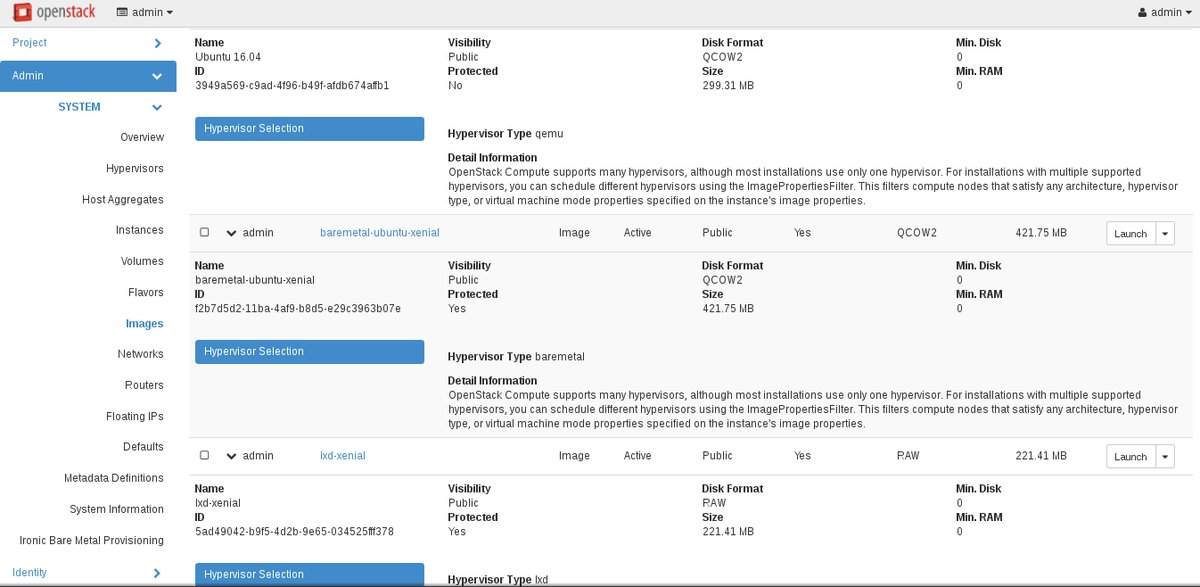
Isolating your existing images
Before deploying Ironic into your cloud you're going to to want to isolate all images to a given hypervisor-type. In this example we're assuming QEMU (KVM) has already been deployed and will be our primary hypervisor_type. To lock everything down we'll be using using image metadata (properties) and the openstack client.
To run the following set of commands login to a utility node (container) and then source the
openrcfile in the root users home directory giving you access to the admin API.
Sadly there is no "good" way to pull a list of all images in a given cloud, so for this example we're querying the database to get a list of active image UUID's. We then use the generated list in loop to set the hypervisory_type property using the openstack client should it not already be set.
# Pull a list of all active images
for i in $(mysql --unbuffered -sNL -e 'select id from images where status="active"' glance); do
  # If hypervisor_type is not set on the existing image set the hypervisor_type property to "qemu"
  if ! openstack image show "$i" -c "properties" | grep -w "hypervisor_type" > /dev/null; then
    openstack image set "$i" --property hypervisor_type=qemu
  fi
done
If you've not created and uploaded your Ironic Flavors and Images (note these are special images and flavors) see this post which covers the image and flavor creation process Ironic requires.[1]
Neutron Networks
In the general case, the neutron network can be a simple flat network. In the complex case, this can be whatever you need it to be so long as you can PXE boot a machine using it. In my example I'll be using a flat network which is shared with my infrastructure allowing Ironic access to everything it needs.[2] [3]
As stated previously we're assuming all neutron networks are already in-place. The following output is simply an example of a network known to function in an Ironic deployment. I find visualizing the config helpful when comparing or troubleshooting other systems.
# neutron net-show cc406eed-f8ef-49c3-b123-179156f02e61
+---------------------------+--------------------------------------+
| Field                     | Value                                |
+---------------------------+--------------------------------------+
| admin_state_up            | True                                 |
| availability_zone_hints   |                                      |
| availability_zones        | nova                                 |
| created_at                | 2016-10-28T20:38:07Z                 |
| description               |                                      |
| id                        | cc406eed-f8ef-49c3-b123-179156f02e61 |
| ipv4_address_scope        |                                      |
| ipv6_address_scope        |                                      |
| mtu                       | 1500                                 |
| name                      | ironic-net                           |
| port_security_enabled     | True                                 |
| project_id                | 5349a69352c74077a7080234cff3fe53     |
| provider:network_type     | flat                                 |
| provider:physical_network | tftp                                 |
| provider:segmentation_id  |                                      |
| revision_number           | 5                                    |
| router:external           | False                                |
| shared                    | True                                 |
| status                    | ACTIVE                               |
| subnets                   | 9b9288a9-8ddc-4d74-a91a-f7049d202842 |
| tags                      |                                      |
| tenant_id                 | 5349a69352c74077a7080234cff3fe53     |
| updated_at                | 2016-10-28T20:38:09Z                 |
+---------------------------+--------------------------------------+

# neutron subnet-show 9b9288a9-8ddc-4d74-a91a-f7049d202842
+-------------------+--------------------------------------------------+
| Field             | Value                                            |
+-------------------+--------------------------------------------------+
| allocation_pools  | {"start": "172.19.1.100", "end": "172.19.1.200"} |
| cidr              | 172.19.0.0/22                                    |
| created_at        | 2016-10-28T20:38:09Z                             |
| description       |                                                  |
| dns_nameservers   | 8.8.4.4                                          |
|                   | 8.8.8.8                                          |
| enable_dhcp       | True                                             |
| gateway_ip        | 172.19.0.1                                       |
| host_routes       |                                                  |
| id                | 9b9288a9-8ddc-4d74-a91a-f7049d202842             |
| ip_version        | 4                                                |
| ipv6_address_mode |                                                  |
| ipv6_ra_mode      |                                                  |
| name              | ironic-subnet                                    |
| network_id        | cc406eed-f8ef-49c3-b123-179156f02e61             |
| project_id        | 5349a69352c74077a7080234cff3fe53                 |
| revision_number   | 2                                                |
| service_types     |                                                  |
| subnetpool_id     |                                                  |
| tenant_id         | 5349a69352c74077a7080234cff3fe53                 |
| updated_at        | 2016-10-28T20:38:09Z                             |
+-------------------+--------------------------------------------------+
Create the Ironic configuration file
In order to deploy Ironic you need two entries added to your openstack_user_config.yml allowing an Ironic infrastructure and a compute node to be deployed within your environment. An Example of an AIO configuration file can be found here. The file used in production will provide for an HA ironic infrastructure and a single compute service facilitating the nova Ironic compute driver and scheduler. Create this file /etc/openstack_deploy/conf.d/ironic.yml containing the following contents.
ironic-infra_hosts:
  controller01:
    ip: 172.19.100.23
  controller02:
    ip: 172.19.100.24
  controller03:
    ip: 172.19.100.25

ironic-compute_hosts:
  controller01:
    ip: 172.19.100.23
With the ironic.yml configuration file in place we can now run the openstack-ansible playbooks to deploy Ironic into the environment. The first step is to ensure we have all of the containers needed to run Ironic.
openstack-ansible lxc-container-create.yml --limit ironic_all # This process can take a few minutes.
Add Ironic endpoints to the load balancer
If you are using HAProxy for your load balancer run the haproxy-install.yml playbook to deploy updated config. If you happen to be using some other load balancing solution have a look at the haproxy configuration template for information on what you will need to implement outside of OSA and the scope of this post.
openstack-ansible haproxy-install.yml
Deploy Ironic
With the containers created and the load balancer updated we're on the last step to deploying Ironic which is simply need to run the ironic installation playbooks.
openstack-ansible os-ironic-install.yml # This process can take a few minutes.
With ironic deployed you can login to your utility node and test that the Ironic API is functional. This simple command will provide data on the implement Ironic driver.
# ironic driver-list
+---------------------+------------------------------------------------------------------------------------------------------------------------------------------------------+
| Supported driver(s) | Active host(s)                                                                                                                                       |
+---------------------+------------------------------------------------------------------------------------------------------------------------------------------------------+
| agent_ipmitool      | controller02_ironic_conductor_container-XXX, controller01_ironic_conductor_container-XXX, controller03_ironic_conductor_container-XXX                |
+---------------------+------------------------------------------------------------------------------------------------------------------------------------------------------+
After you've confirmed that Ironic is deployed and functional Have a look here on how to enroll an Ironic node into your cloud.
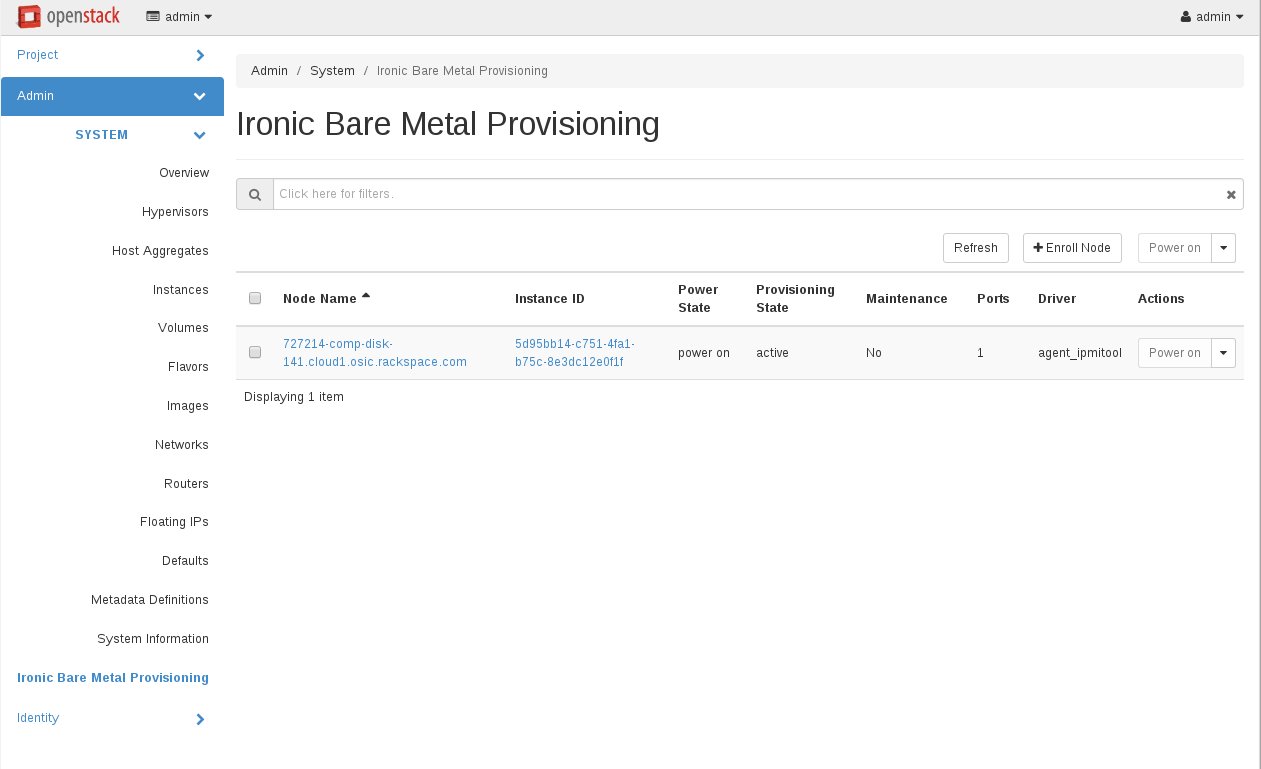
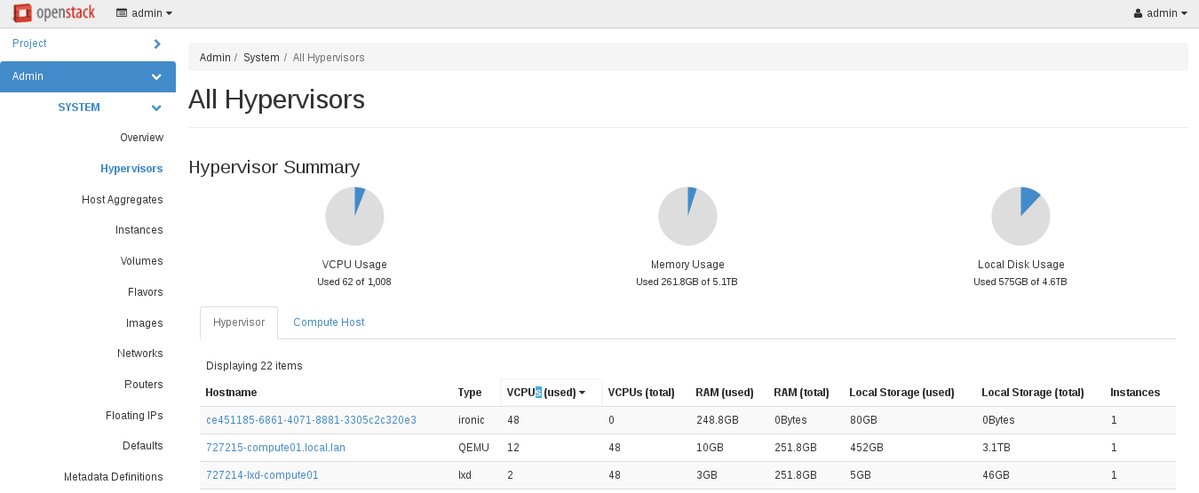
Visualizing the cloud and Verifying
While new nodes can be deployed with simple nova API commands It's sometimes more fun to use the dashboard as its more visually gratifying. Once logged into Horizon build resources, access the admin "Ironic Baremetal Provisioning Panel", explore various tenants provisioning capabilities, and finally increase quotas so use can use the new resources.
Foot Notes
See the official documentation for more on the OpenStack-Ansible ironic deployment architecture. ↩︎
More information on provider networks and their corresponding architectures ↩︎